If you have encountered unexpected issues while working with Docker… you are in the right place!
Whether you’re a seasoned Docker user or just getting started, you may have encountered some unexpected “hiccups” along the way. In this article, we’ll analyse various Docker hiccups that I have experienced while developing and administrating servers, and try to provide practical solutions to fix them.
Buckle up and get ready to tackle those Docker challenges head-on!
Hiccups Covered
Here is a list of small problems that we will try to fix:
Huge Container Logs
I plan to update this article from time to time with more small Docker problems that I find interesting.
Huge Container Logs
As a naive and noob Docker user, I was under the impression that each container’s logs were automatically trimmed to minimise disk space usage. But… this is not the case, as Docker by default keeps all the logs… and I had to find it the hard way one day that some services were throwing error 500 and on further inspection, I found out that a server hosting 2 GitLab containers run out of disk space (each instance generated 39GB of logs).
To address the issue, I found out that I could configure each one of my containers to limit the log file in size and number. For projects deployed as a docker-compose.yml, one can configure the logging behavior of each service to apply these limits. Here is an example:
Let’s say you want to run a Docker server on the cloud. Amazon Web Services (AWS) and its Elastic Compute Cloud (EC2) is one option. It’s not the cheapest one, but it’s chosen by many.
Preparing an EC2 Instance
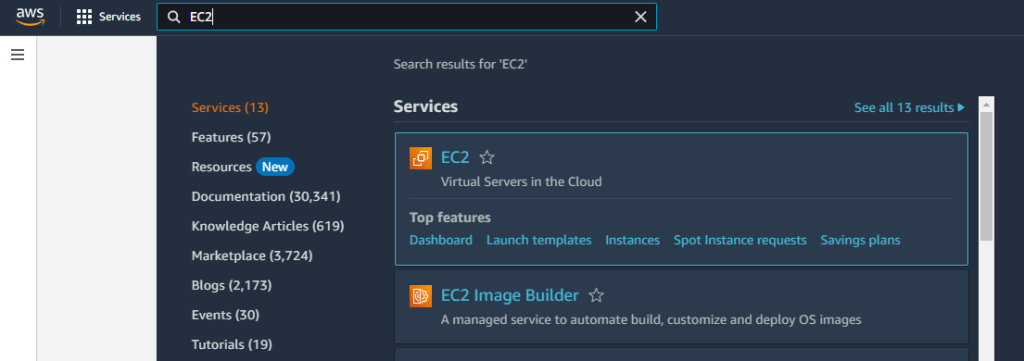
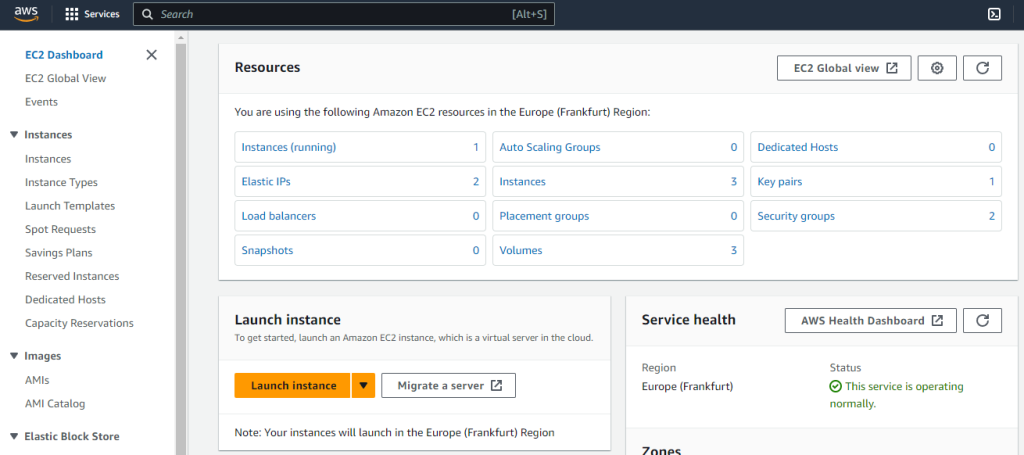
To start with, let’s prepare the EC2 instance that will be hosting our Docker server. Head to your AWS portal, log in and then find the EC2 Dashboard (you can do that by searching for “EC2” on the top search bar). Make sure you have selected the appropriate location (e.g. Frankfurt) from the dropdown list on the top right corner of the page, and then click the “Launch instance” button.
Finding EC2 dashboard using the search bar in AWS.The AWS EC2 Dashboard. You can launch an instance by clicking the orange “Launch instance” button.
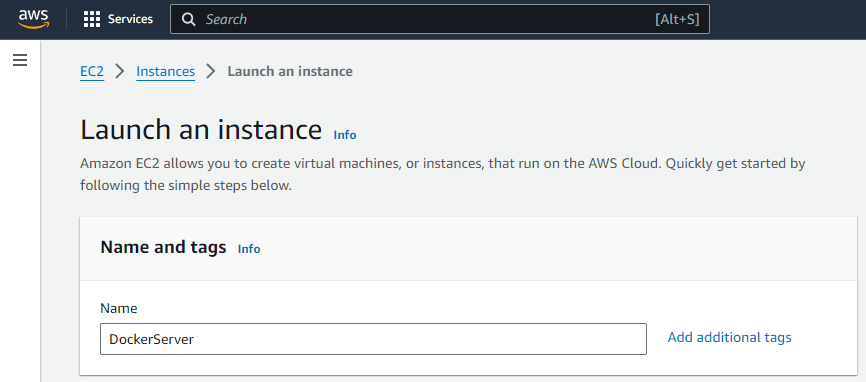
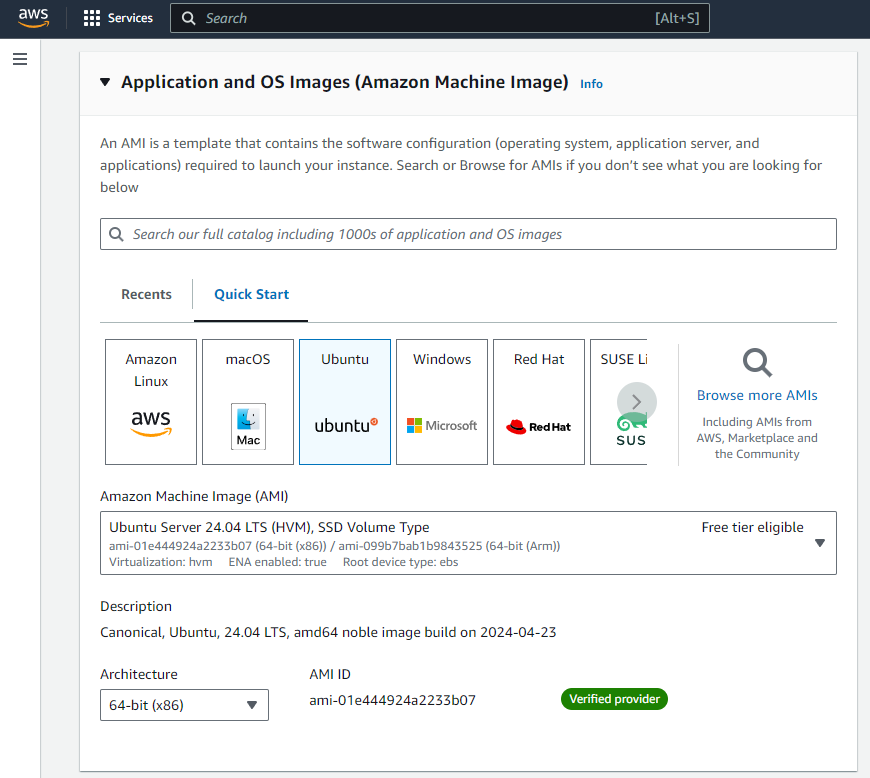
Let’s now configure the instance to be launched. To start with, we should give a name to the instance so that we can recognize it and select an OS image to install on the instance (we will be choosing the latest stable Ubuntu version).
Insert a name for your EC2 instance.Select the latest Ubuntu image to be installed on your EC2 instance.
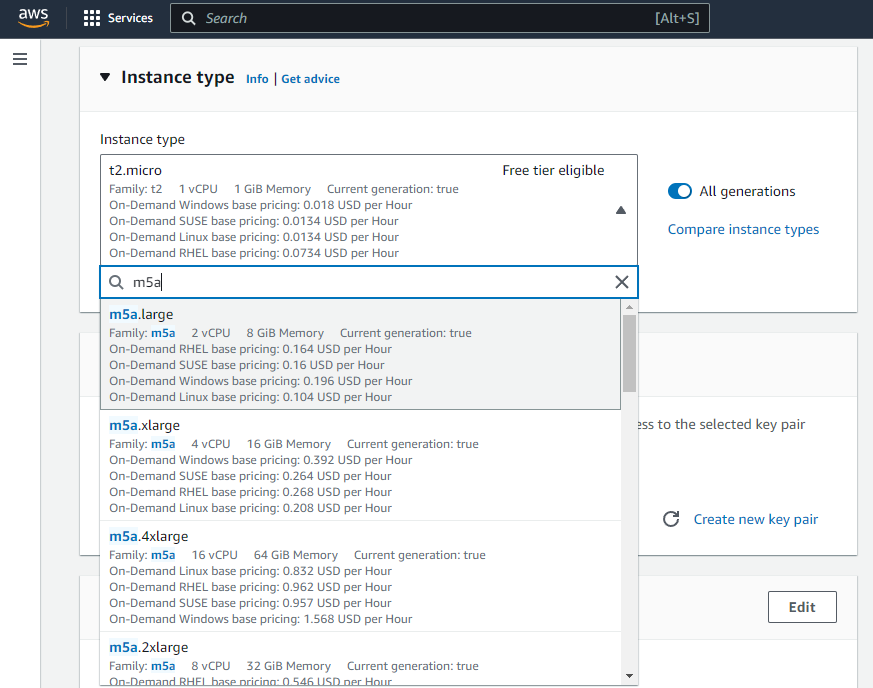
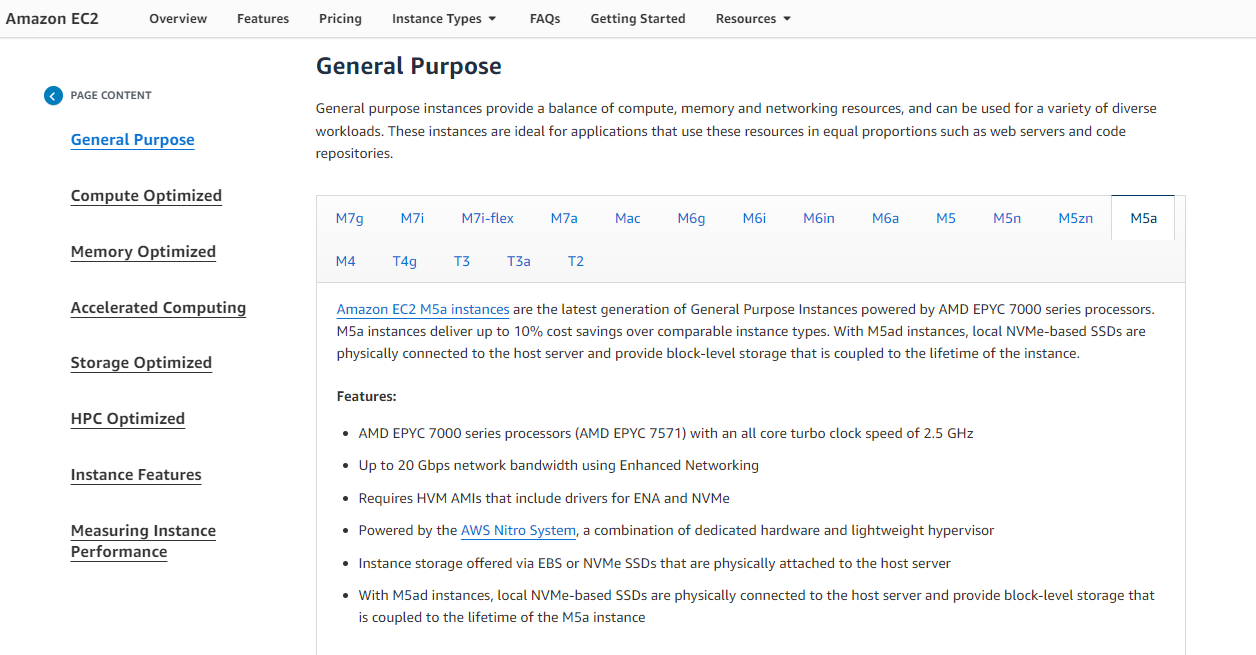
Following that, you will have to select the instance type of the EC2 instance. The instance type is defining your EC2 instance’s hardware specifications. For my purposes, we will be choosing the “M5a” instance type family, powered by AMD EPYC 7571 processors, and selecting the smallest instance size available (namely “m5a.large”, featuring 2 vCPUs and 8 GiB of Memory) for the configuration of the server (we can upgrade it easily later on). You can find more information about the various EC2 instance types here.
Selecting the EC2 instance’s type.Find more information about the various EC2 instance types here.
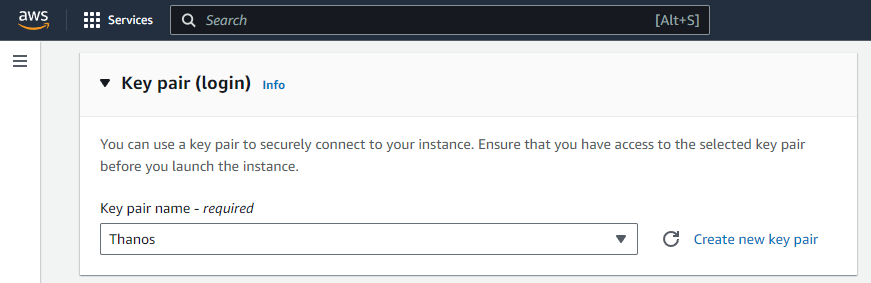
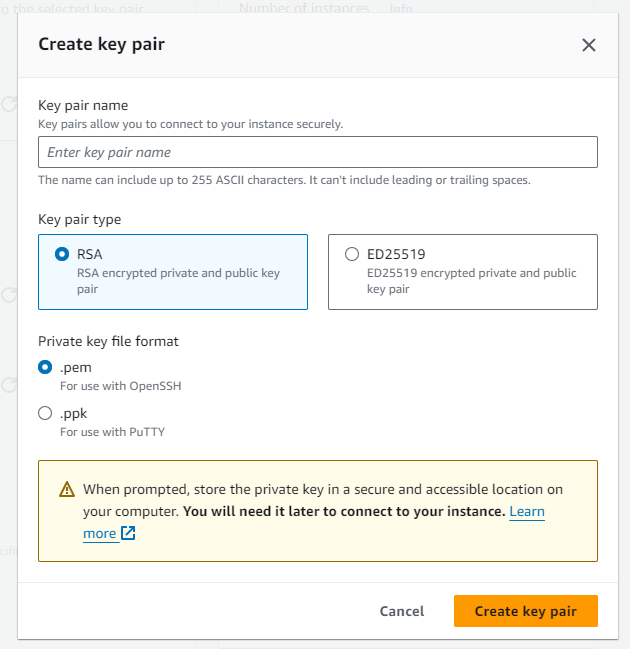
Moving on, you will have to select a Key pair to install on the instance. This will allow you to access the server through SSH easily. If you don’t have one already created, create one and install it on your computer.
Select your key pair to be added on the EC2 instance.Create a new key pair if you don’t have one.
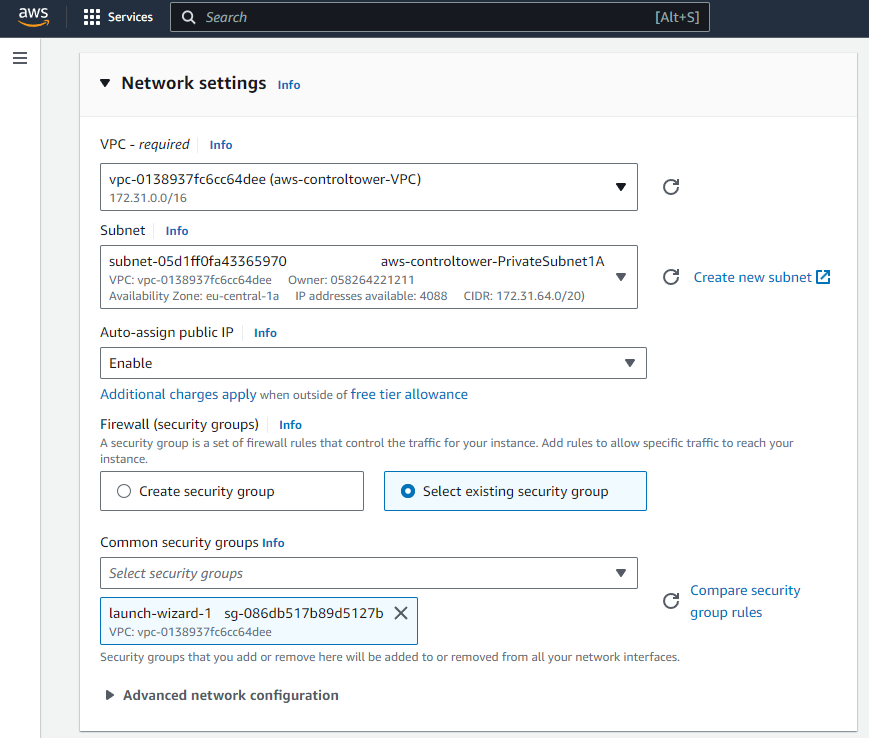
The next crucial step is to configure the network settings of the EC2 instance. Make sure that your instance is connected to the appropriate VPC and that the selected subnet has internet access so that you can expose the instance’s services to the public internet.
Configure the network settings of the EC2 instance.
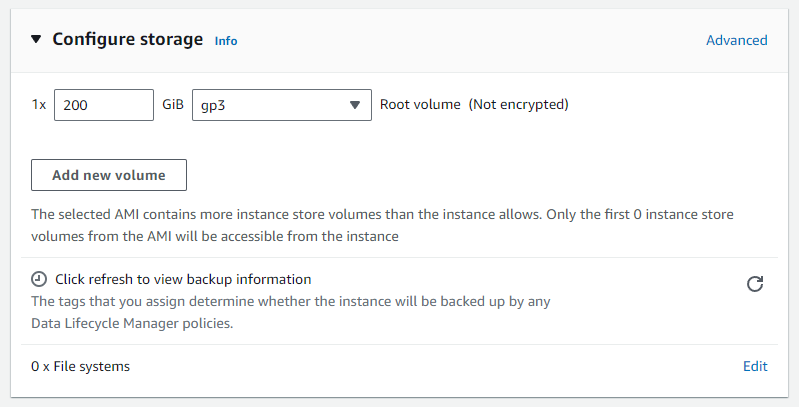
The last step of setting up our new EC2 instance is to configure its storage. For our example, I will be setting it to 200 GiB of storage, but you should be configuring that according to your needs.
Configure the storage of the EC2 instance.
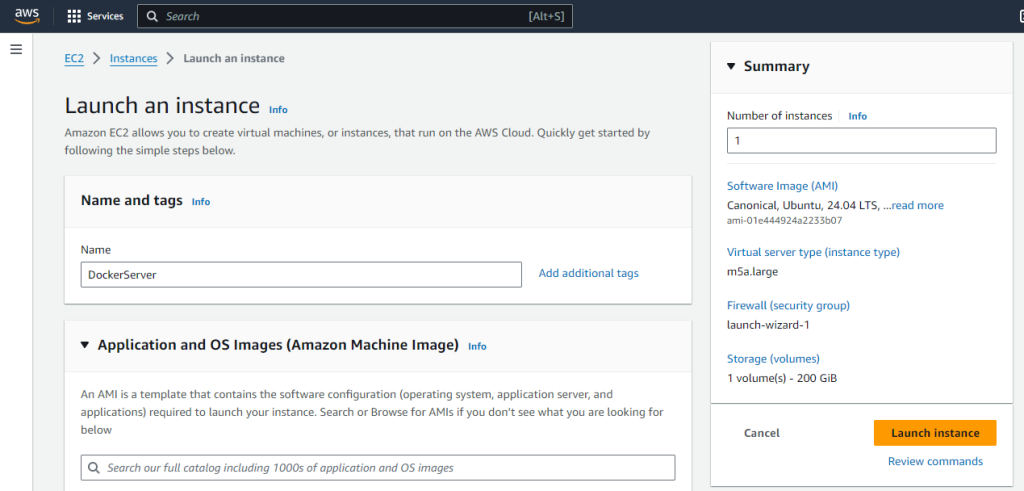
Finally… we are done! Time to launch the new EC2 instance…
Review the configuration and click “Lacunch instance”.
Installing Docker
Installing Docker on an Ubuntu EC2 instance is relatively trivial, as you just have to follow the official guide. Here are the commands you will need to run (based on the guide of 2023):
Unfortunately, by default, the containers will be able to request and retrieve the AWS Metadata information. These may result in the leak of private keys that a malicious container can use to get access to the host server (the AWS EC2 instance running the docker containers).
Fortunately, to achieve that and leak these metadata, the attacker will have to get Remote Code Execution (RCE) on the container or Server Side Request Forgery (SSRF), which may not be trivial depending on the software running on a container. Yet again, in some cases, like in CTF competitions, it is usually expected that the user will get such access to the container, thus making by default the whole server vulnerable.
To fix this issue, the only thing we can do is configure the AWS Metadata to accept requests from the host machine and not from the containers inside it. To do so, we can filter the requests based on their hops, limiting the accepted hop value to 1. You can set this option on your instance by running the following command (replace %your_instance_id% with your instance ID) :
As its website explains, LibreNMS is “a fully featured network monitoring system that provides a wealth of features and device support”. It can be used to monitor servers and services so make sure they are functioning as intended.
Setting up LibreNMS
To set LibreNMS up, we will follow the official guide, correcting some of the commands and installing some additional software.
First, we will download the latest LibreNMS code from its GitHub repository, then we will extract the Docker-related files and delete the rest of the files:
mkdir ./librenms-temp
cd ./librenms-temp
wget https://github.com/librenms/docker/archive/refs/heads/master.zip
unzip master.zip
cd ..
cp -r ./librenms-temp/docker-master/examples/compose ./librenms
rm -rf ./librenms-temp
cd librenms
We can now optionally edit the .env file (e.g. to change the default database password):
nano .env
Now let’s launch the containers of LiberNMS:
sudo docker compose -f compose.yml up -d
As soon as all the containers are up, visit http://localhost:8000/ (or replace localhost with your server’s IP) and initialise LibreNMS by creating an admin account.
Installing Nagios plugins on LibreNMS Docker
After completing the LibreNMS setup, we can shut it down temporarily to install the Nagios plugins. To shut LibreNMS down, we can turn off its containers:
sudo docker compose -f compose.yml down
Let’s now install nagios-plugins that will allow us to create some service checks inside LiberNMS. To do so, we will create a temporal Ubuntu container (named tmp) to install nagios-plugins copy the binaries we need to LibreNMS files and delete them:
The plugins will now be available inside the “Add Service” menu, under “Type”.
Setting up Website checks
Now that Nagios plugins are installed, we can use the Nagios check_http plugin to monitor the status of our websites.
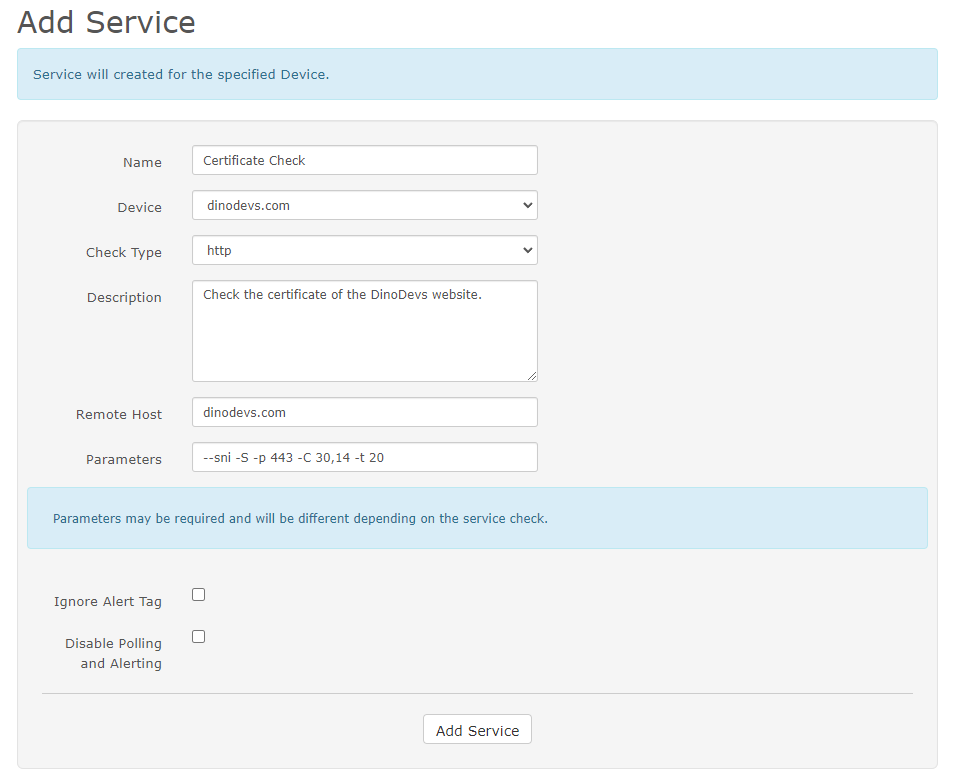
Certificate Check
Let’s create a service to check our website certificate.
Click + Add Service from the menu
Give a name to the service
Select a device from the list (maybe the server hosting the website)
Select http as a Check Type
Input the domain of your website inside the Remote Host input
Input the parameters --sni -S -p 443 -C 30,14 -t 20 inside the Parameters input
Click Add Service
This will check the certificate of the website and generate a critical alert if it is about to expire in less than 14 days or generate a warning if it is about to expire in less than 30 days.
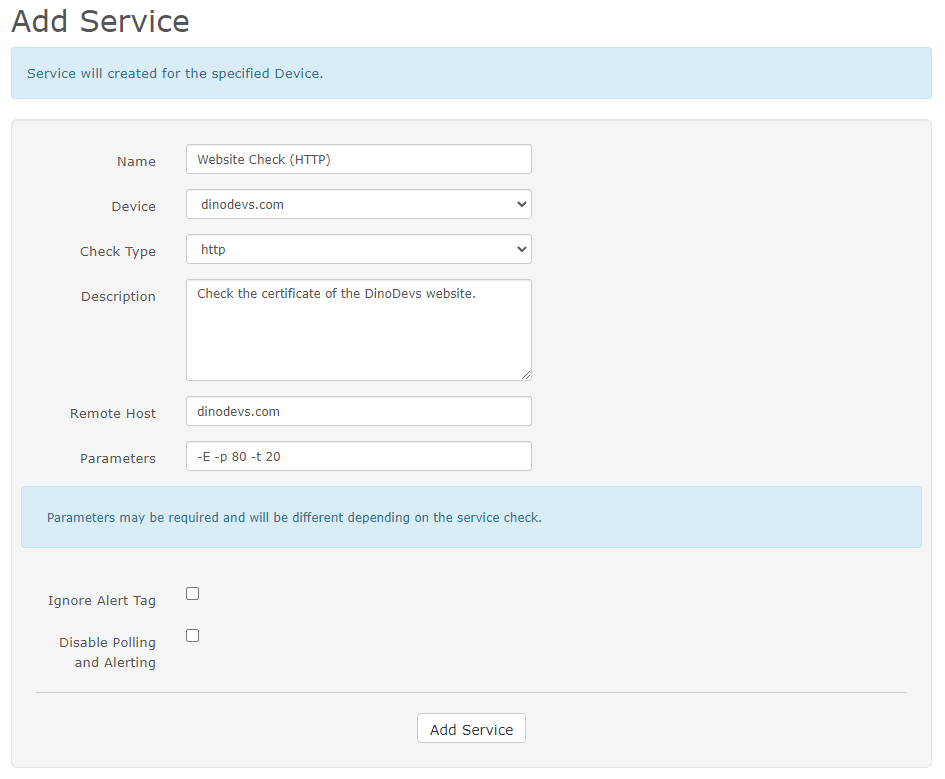
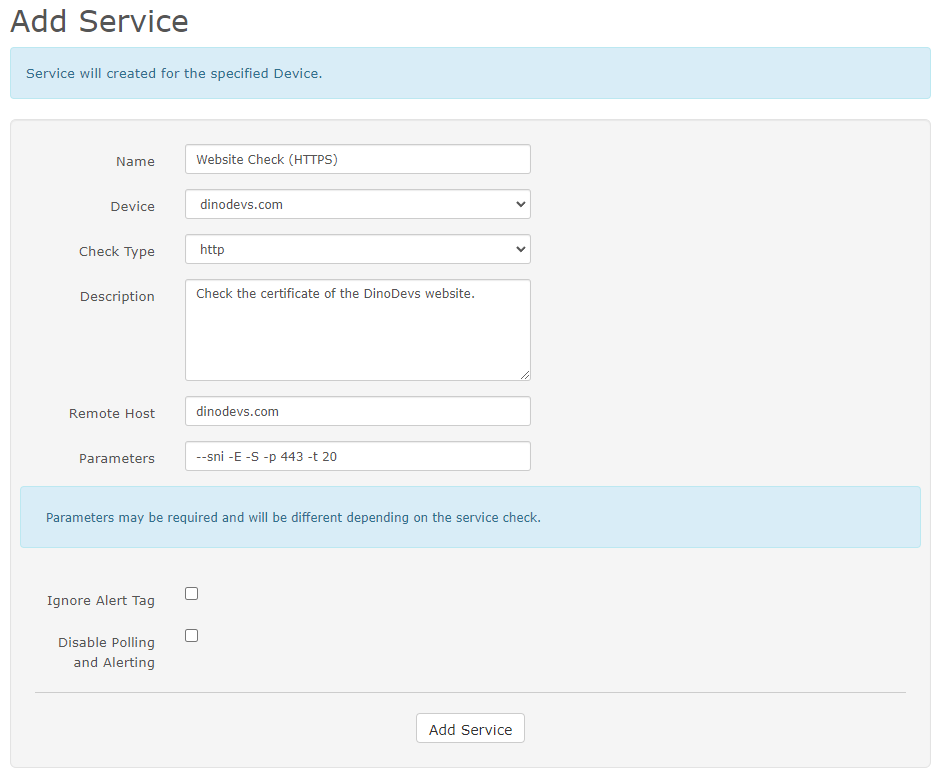
Website Check (HTTP/HTTPS)
Let’s create a service to check our website status over HTTP or HTTPS.
Click + Add Service from the menu
Give a name to the service
Select a device from the list (maybe the server hosting the website)
Select http as a Check Type
Input the domain of your website inside the Remote Host input
Input the parameters inside the Parameters input
to check an HTTP website insert the: -E -p 80 -t 20
to check an HTTPS website insert the: --sni -E -S -p 443 -t 20
Click Add Service
This will check the website and generate an alert in case it throws an error or if the website is unresponsive.
Using Nagios http plugin to check website’s certificate.Using Nagios http plugin to check HTTP website.Using Nagios http plugin to check HTTPS website.
Sum up
LibreMNS is an easy to setup tool that can assist you in monitoring your servers and services. Plus, it can be easily set up using Docker. You can give it a try! 😊
I found Portainer to be just what I needed to manage the containers of my small Docker servers. You can install it easily as a container running on the same Docker server that you want it to manage.
Setting Portainer up
To install it, you first need to create a volume so that it can store your accounts and preferences:
sudo docker volume create portainer_data
Then you can deploy the container using the official Portainer image (please note that in the following command, I removed the -p 8000:8000 port mapping as I will only be using the HTTPS protocol to connect to it):
Now, you can visit though https (under port 9443) the deployed Portainer app to create an admin account. For example, if your server is located at 10.10.1.30, you can access Portainer at:
https://10.10.1.30:9443/
Please note that your browser will not trust the certificate, thus you will have to “Accept the risks” and proceed.
Updating Portainer
Updating Portainer to the latest version is relatively simple. First, you will have to pull the latest version of the container using:
sudo docker pull portainer/portainer-ce:latest
Then you can just recreate the container without deleting the volume holding your configuration: